main page
Face | Inset generally works ok on single faces, with certain exceptions (eg 'U' shaped single face, (9809) - try using Face | Intrude with some messing about).
Using Inset on a collection of (adjacent) faces is, however, a somewhat different proposition - this topic has been raised several times at ODF and since previous posts can easily get 'overlooked', I've decided to add some info here.
For the sake of clarity, let's be certain of what's trying to be achieved - the creation of a new series of edges inside (usually) the original face selection - where the new edges are parallel to (and the same perpendicular distance away from) the original edges defining the selection. The original boundary edges should be unmodified.
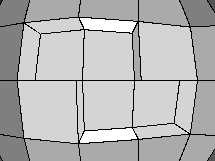
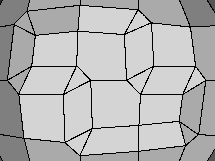
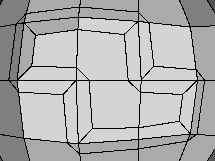
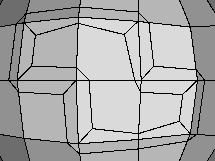
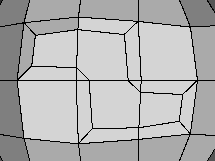
With anything other than a flat 2D square region, this will give you problems - unequal scaling, shift of origin and a 'recess' type action.
2). Select Faces, press L to get the boundary edges and apply Edge | Bevel (drag to suit)
This will create 2 new sequences of edges in place of the original one around the face selection. Whilst these 2 new edge sequences are nicely parallel (since Bevel's been sorted - sorta), there's a few issues that need addressing:
Unwanted edges at the corner 'triangles' need removing (use Edge | Collapse) - but doing so degrades the parallelism originally created.
A new 'mid-way' edge sequence needs to be created to re-establish the original selection boundary - either use Edge | Connect on all relevant edges OR re-select original face selection (easier if Store | Selection used in first place, on hotkey) and use Face | Bump, accepting default state.
Outer (new) edge sequence needs to be removed - which can be messy, if you are trying to keep things as they should be.
3). Select Faces, press L to get boundary edges and apply Edge | Bevel -> Zero (constrain with shift). With these (zero width) faces still selected (eyeball info readout), apply Face | Bump, constrain to zero and use + /- keys to adjust the 2 new boundary edge sequences.
Although this is limited to 10% 'steps', this may well be sufficient for many purposes - if not, repeat the operation - the 'step' dimension will be less next time around, because this tool is working on a percentage basis - not distance.
Whilst the edges will not be as parallel as those produced by bevel (because of the way Bump works), the original edges will be unaffected and the outer (unwanted) edge sequence can generally be (relatively) easily selected and then removed with Edge | Dissolve. Select object and apply Cleanup.
4). Select Faces, press L for boundary edges and apply Edge | Extrude -> Zero and adjust new boundary edges with + / - keys (as before).
Since this produces similar (but inferior, imo) results to (3), the tidying up procedure is also similar.
5). Select Faces, invoke Select | Inverse and apply Face | Bump -> Zero (adjust with + / - keys.
This method has the benefit of being relatively straightforward and creates the new geometry in the correct area without disturbing the original boundary edges of the selection.
Downside is that new edges aren't necessarily parallel to the original ones and it's working in 10 % 'steps'
In general, the results obtained with any of the above methods, using tools that rely on placing new edges in positions based on percentage calculations - will be heavily dependant on the shape and complexity of the selection.
Having a 'choice' of methods might help in getting the best result.
Whilst there's other 'possibilities' - like using Inset and 'joining up the dots', these are fairly impractical - to say the least - for normal uses :)