• Website
  • Search
  • Member List
  • Help
  • Old Forum
  • Social Media
    •   @Wings3dOfficial
    •   @Wings3dOfficial
    •   Wings3dOfficial
    •   Wings3dOfficial
  • Register
  • Login
  • Website
  • Search
  • Member List
  • Help
  • Old Forum
  • Register
  • Login
Wings 3D Development Forum Wings 3D Gallery v
1 2 3 4 5 … 17 Next »
Playing with Wings3D for fun (Micheus)

 
  • 8 Vote(s) - 4.25 Average
Playing with Wings3D for fun (Micheus)

Pages (25): « Previous 1 … 11 12 13 14 15 … 25 Next »
Jump to page 
micheus
Offline

Forum's Admin and Support | Bug fixer
Posts: 3,681
Threads: 185
Joined: Jun 2012
#121
03-01-2017, 06:51 PM (This post was last modified: 03-18-2019, 01:06 PM by micheus.)
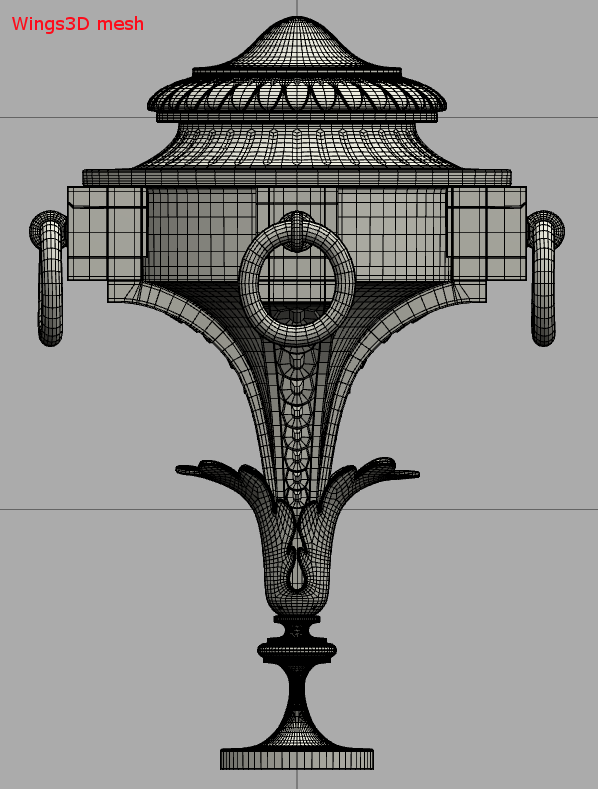
Back to Ornament project...

When painting the model I found the details in the "arms" were not good enough by using only a nomal map. Then, I decided to add the details to the mesh that could be annoying because it was already uv mapped and I didn't want to lose my work.

I may have chosen the hard way, but I want to experiment it. I extracted the curved mesh from the "arm", unwrapped it and then added the details. At the end, I "bend" it back to its shape.
[Image: rework-mesh-mapped-0.png]

Glue it on the "arm" was where I did a mistake. I didn't noticed early enough that I forgot to add one extra edge loop to the "arm" (near to bottom) in order to make all the vertices in both objects match (I did that for others). Because of that I used Bridge instead of just Weld.
[Image: rework-mesh-mapped-1.png]

By using Bridge with wrong number of vertex the uv map was messed after I apply AutoUV [Face]->Project-Unfold (left image). I have gone too far to use Undo, so the way was to fix thing by hand (no the uvmap). Sad
If we can use Weld we have less troubles.
[Image: rework-mesh-mapped-2.png]

Here is a comparison of the previous approach and the new one. (rendered in KT)
[Image: rework-mesh-mapped-3a.png]
[Image: tw.png] @MicheusVieira [Image: yt.png] @MicheusVieira [Image: da.png] Micheuss [Image: ig.png] micheus4wings3d
* Wings3D Team stands for: Björn and Dan
micheus
Offline

Forum's Admin and Support | Bug fixer
Posts: 3,681
Threads: 185
Joined: Jun 2012
#122
03-08-2017, 03:47 PM (This post was last modified: 11-20-2018, 04:04 PM by micheus.)
I finally ended the work on the mesh:


... and just added some materials in Substance Painter:
[Image: ornament-final-grain-stone.png] [Image: ornament-final-marble.png] [Image: ornament-final-green-marble.png]

Now I just need to build a render scene with it. Cool
[Image: tw.png] @MicheusVieira [Image: yt.png] @MicheusVieira [Image: da.png] Micheuss [Image: ig.png] micheus4wings3d
* Wings3D Team stands for: Björn and Dan
oort
Offline

3D Obsessed

Posts: 1,184
Threads: 69
Joined: Nov 2012
#123
03-08-2017, 10:03 PM
Micheus,
Looks great. It was fun watching the progress...
I look forward to seeing it rendered in a scene. Curious how you will use it. Being top heavy it may have to be some ornamental feature used on some other object??? Smile

oort
micheus
Offline

Forum's Admin and Support | Bug fixer
Posts: 3,681
Threads: 185
Joined: Jun 2012
#124
03-10-2017, 12:21 AM (This post was last modified: 03-10-2017, 01:06 AM by micheus.)
(03-08-2017, 10:03 PM)oort Wrote: It was fun watching the progress...
Yeah. There are more in my Wings3D Collection

Quote:Being top heavy it may have to be some ornamental feature used on some other object??? Smile
Absolutely.


While I'm still reinstalling all my stuff (due a OS corruption), here is a visualisation of it:


Ornament Shape by micheus on Sketchfab

It seems that I need to fix something in the normal exporting from Substance Painter. I just noticed the normal created by it is inverted during the mix with normal map I created using Gimp (at least for Sketchfab).
[Image: tw.png] @MicheusVieira [Image: yt.png] @MicheusVieira [Image: da.png] Micheuss [Image: ig.png] micheus4wings3d
* Wings3D Team stands for: Björn and Dan
tkbd
Offline

Senior Member

Posts: 451
Threads: 115
Joined: Nov 2012
#125
03-10-2017, 01:16 PM
I thought nice that able to see from every direction. Smile
It very informative.
--------
tkbd
micheus
Offline

Forum's Admin and Support | Bug fixer
Posts: 3,681
Threads: 185
Joined: Jun 2012
#126
03-13-2017, 09:14 AM (This post was last modified: 11-20-2018, 04:05 PM by micheus.)
Just a render of a abstract object I "found" by accident when I was preparing the step-by-step to build a Spiky shape. Biggrin

[Image: Dodecahedron-_Flower-1024x576.png]
[Image: tw.png] @MicheusVieira [Image: yt.png] @MicheusVieira [Image: da.png] Micheuss [Image: ig.png] micheus4wings3d
* Wings3D Team stands for: Björn and Dan
micheus
Offline

Forum's Admin and Support | Bug fixer
Posts: 3,681
Threads: 185
Joined: Jun 2012
#127
03-22-2017, 08:25 AM (This post was last modified: 03-18-2019, 01:09 PM by micheus.)
Back to the Ornament...

Well, after long time looking for museum to exhibit my ornament I finally got a candidate. Biggrin
It's the Muzeul National de Arta al Romaniei and it will be shown at Pavilionul Sala Tronului

I wanted to better integrated the object to the room, so I initially thought to recreate some details at the ceiling (beam), but it turned out really useless (I couldn't make use of it in render as I wanted):
[Image: museum-sketch.gif]

Now, into Kerkythea I spent some hours trying to find a nice light/color combination - hard task. Sad
Some options I tried using the PhotonMap-Quick presset:
[Image: Light_test_in_Kerkythea.jpg]
Wait a couple of minutes to get a result, store it and compare after is a big time consumption. The material also needed be tuned to match with the light settings. The maps created for PBR render didn't bring me the same result in Kerkythea.

I decided to change the approach and I masked the rendered image with omni lights and mixed it with Gimp:
[Image: gimp-process.png]

As the photo has some grains I extracted a noise pattern from it and added to the rendered image:
[Image: ornament-noise.png]

A preview is here. Which one you think I should produce a full quality and big render?
[Image: Ornament-_Bucarest_museum-rough_stone.jpg] [Image: Ornament-_Bucarest_museum-green_marble.jpg]
[Image: tw.png] @MicheusVieira [Image: yt.png] @MicheusVieira [Image: da.png] Micheuss [Image: ig.png] micheus4wings3d
* Wings3D Team stands for: Björn and Dan
Marcin Maćkowiak
Offline

The only limit is your imagination

Posts: 171
Threads: 36
Joined: Jan 2013
#128
03-22-2017, 12:57 PM
Colours of the first photo are better I think. I would add some more reflections to the object. When I look into the background of the image It looks more glossy etc. Maybe It will fit with the whole scene more nicer.
Follow me:
YOUTUBE
INSTAGRAM
FACEBOOK
WEBPAGE
oort
Offline

3D Obsessed

Posts: 1,184
Threads: 69
Joined: Nov 2012
#129
03-22-2017, 02:19 PM
Micheus,

Nice environment for your object...

I agree with Marcin that the left image looks better. The texture on the right is more interesting but too dark and does not fit as well in the scene.

I am thinking you were trying to get a material that fits with what appears to be stonework below the large picture on the wall. So maybe not so reflective is good???

I was imagining several of the ornaments mounted on a banister/railing in a room. Maybe add some stairs that the camera is walking down on. Just a thought...

Maybe give YafaRay a try for faster renders... Smile

oort
micheus
Offline

Forum's Admin and Support | Bug fixer
Posts: 3,681
Threads: 185
Joined: Jun 2012
#130
03-22-2017, 03:39 PM (This post was last modified: 11-20-2018, 04:06 PM by micheus.)
(03-22-2017, 12:57 PM)Marcin Maćkowiak Wrote: Colours of the first photo are better I think. I would add some more reflections to the object.
I also thought the clean color fits better in this environment, but that material is intended to be a rough rock (like we see in some old Roman artefacts).

(03-22-2017, 02:19 PM)oort Wrote: I agree with Marcin that the left image looks better. The texture on the right is more interesting but too dark and does not fit as well in the scene.
I am thinking you were trying to get a material that fits with what appears to be stonework below the large picture on the wall. So maybe not so reflective is good???
I agree.

Quote:I was imagining several of the ornaments mounted on a banister/railing in a room. Maybe add some stairs that the camera is walking down on. Just a thought...
I think it's too big for this case of use.

Thank you guys for the comment. Today I spent some time trying to figure out what happened with the yellowish marble texture that I was not able to use it in Kerkythea. It seems like I select a wrong type of .png encoding.

So, I thing we can satisfy all of us (be cause I also liked more it) with clean color, some glossy and a better environment integration. Look this:
[Image: Ornament-scene-yellow-marble.jpg]

What do you think. Maybe should I tweak its color a litter and make it less dark?
[Image: tw.png] @MicheusVieira [Image: yt.png] @MicheusVieira [Image: da.png] Micheuss [Image: ig.png] micheus4wings3d
* Wings3D Team stands for: Björn and Dan
« Next Oldest | Next Newest »

Users browsing this thread: 1 Guest(s)

Pages (25): « Previous 1 … 11 12 13 14 15 … 25 Next »
Jump to page 


  • View a Printable Version
  • Subscribe to this thread
Forum Jump:

© Designed by D&D - Powered by MyBB

Linear Mode
Threaded Mode