• Website
  • Search
  • Member List
  • Help
  • Old Forum
  • Social Media
    •   @Wings3dOfficial
    •   @Wings3dOfficial
    •   Wings3dOfficial
    •   Wings3dOfficial
  • Register
  • Login
  • Website
  • Search
  • Member List
  • Help
  • Old Forum
  • Register
  • Login
Wings 3D Development Forum Wings 3D Programming v
1 2 3 4 Next »
New UV Mapping Option

 
  • 0 Vote(s) - 0 Average
New UV Mapping Option

some_yahoo
Offline

Junior Member

Posts: 17
Threads: 8
Joined: Dec 2012
#1
01-26-2020, 08:48 PM
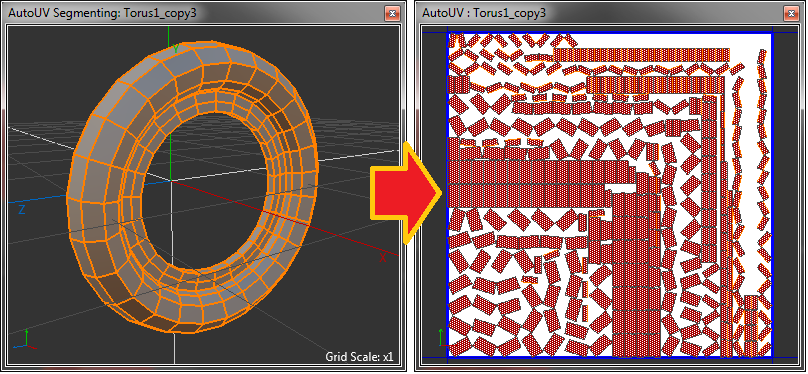
So I have a wheel, (basically a cylinder). I have marked ALL the edges for cut, and I want to overlay all the segments so that they all have the same uv coordinates.

Wings wants to unwrap it all in a pinwheel. What I'd like is a way to perform the following "macro"

  1. Find the longest side of the polygon (object level of course, not face)
  2. Rotate until that side is horizontal.
  3. Do this on as many items as are selected.

After that, I can align them all center, do a 180 flip on any that are upside down, and scale to taste.

Is there anything like that, or alternately how do I get started writing a plugin for this beast?

Because I have hundreds of these to rotate and align, and a computer would be able to do this in a flash.


Attached Files Thumbnail(s)
   
I'd rather live with false hope than with false despair.
micheus
Offline

Forum's Admin and Support | Bug fixer
Posts: 3,676
Threads: 183
Joined: Jun 2012
#2
01-27-2020, 04:06 AM (This post was last modified: 01-27-2020, 04:08 AM by micheus.)
Quote:I have marked ALL the edges for cut, and I want to overlay all the segments so that they all have the same uv coordinates.
...
Is there anything like that, or alternately how do I get started writing a plugin for this beast?

Because I have hundreds of these to rotate and align, and a computer would be able to do this in a flash.
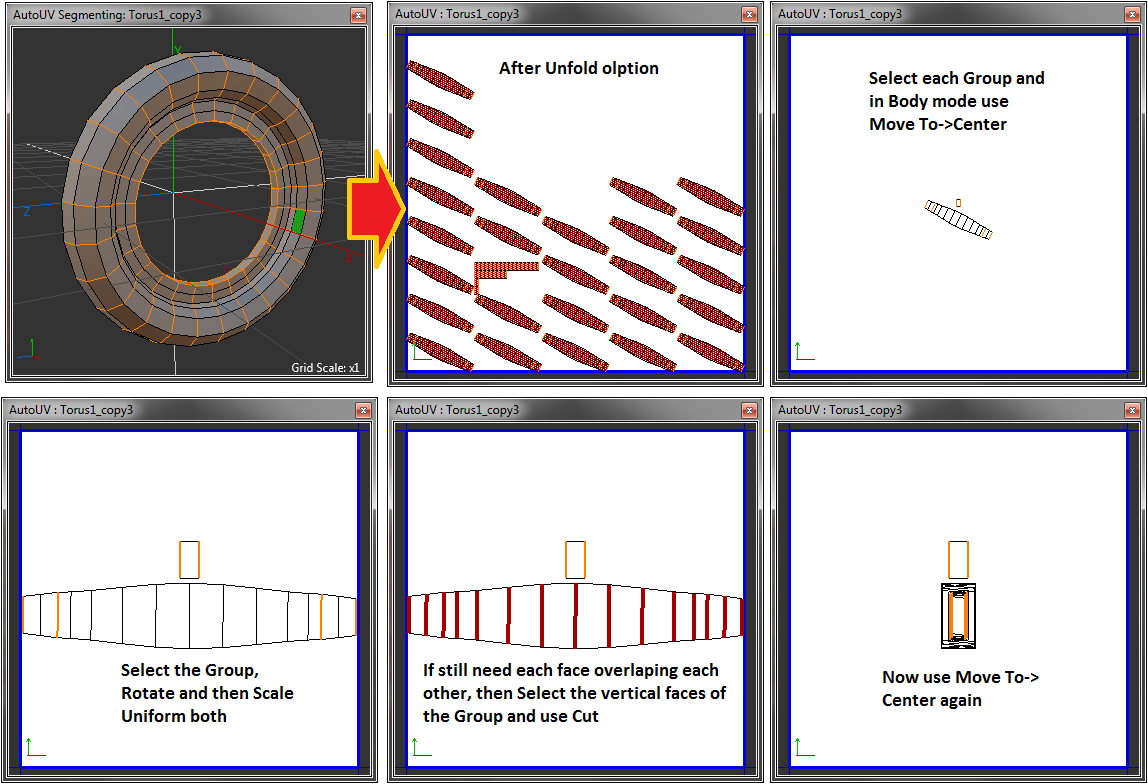
Your image doesn't help much to understand your problem since I can't see the cuts you did as well I couldn't get that pinwheel slands. But, if I understood it right you really cut each face off and want all of then overlapping each other.

This is what I assumed you did:


If that is right, then I think it's an strategy issue. Except if you need to use a very small portion of the map for this tire, then you would to cut it in radial slices. But, even if you want to break all the faces you still can make it easier by starting with this kind of cut which I show in this image - just a few steps:
[Image: tw.png] @MicheusVieira [Image: yt.png] @MicheusVieira [Image: da.png] Micheuss [Image: ig.png] micheus4wings3d
* Wings3D Team stands for: Björn and Dan
tkbd
Offline

Senior Member

Posts: 451
Threads: 115
Joined: Nov 2012
#3
06-22-2020, 11:32 AM (This post was last modified: 06-22-2020, 11:34 AM by tkbd.)
Hi! some_yahoo, I saw your screenshot.
Are you want to radially texturing with already created object?

In this similar example and another approach(It is opposite method),
but I create a texture at first, and then deform an object with after.
[Image: UQhqqigm.png]
(It is also possible to select all edges in the UV window and cut the UV into pieces.)

I'm sorry if I'm wrong understanding.
--------
tkbd
« Next Oldest | Next Newest »

Users browsing this thread: 1 Guest(s)


  • View a Printable Version
  • Subscribe to this thread
Forum Jump:

© Designed by D&D - Powered by MyBB

Linear Mode
Threaded Mode