Wings 3D Development Forum

Full Version: Kerkythea Rendering Software
You're currently viewing a stripped down version of our content. View the full version with proper formatting.
Pages: 1 2 3 4
Just something useful to know and that I found at Kerkythea forum these days:
Differences between MLT and MLT(BPT) Wrote:
  • MLT (Metropolis light transport) should only be used with mesh light emitters or HDRI (which will render caustics) but not with KT point (onmi) or spot lights if you want to get caustics;
  • MLT+BPT (Metropolis light transport with Bidirectional Path tracing) can handle all kind of lights including KT point and spot lights and in all situations giving caustics;
* MLT is a bit faster then MLT&BiPT
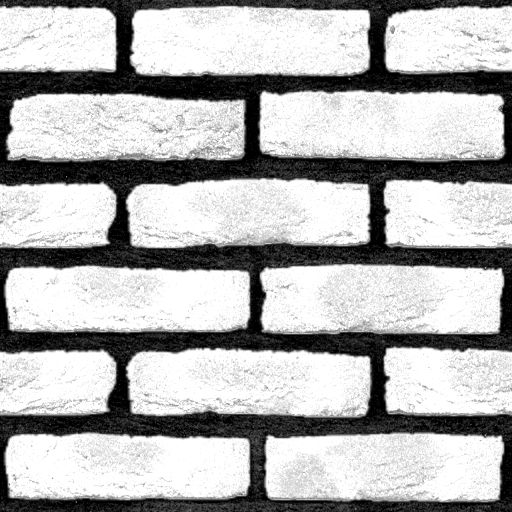
To use Bump map in Kerkythea requires a simple tweak: Invert the values of bitmap image.

The bump image was provided by olve11 in his post:

Bellow we can see in the top row how that image affects the sphere on preview. We can note the mortar seems to be coming out of the wall. In the bottom row we see that by checking the Inverted property in Bitmap Option fix the problem:
[Image: KktBumpFix.png]

But, if we want to use Normal maps then we have more work to do.
Differently of bump map image if we invert the bitmap values we are going to get an ugly effect.
So - if we are creating the textures - the best approach can be invert the bump map image first and use it to generate the normal map. I use GIMP for that most the time.

Here are the maps I created from that one provided by olve11:
[Image: KktBumpFix2.png]
For the normal map works fine in Kerkythea, in GIMP, when we are in the NormalMap dialog we must to check the Invert option as bellow:
[Image: KktBumpFix3.png]

Bellow we have a comparison of all these bump/normal maps. The comments are in the image:
[Image: KerkytheaBumpFixup.jpg]

I hope that can be useful. If someone else wants to play with it here is the files for download.
Cheers
Render time can be huge for some scenes, mainly if we adopt the MLT method. Some factors that have influence over it:
- output Resolution;
- render method;
- hardware - the set: processor/hard drive/memory.

Something I thought it could reduce that time would be to use as less poly count as we could, but I just noticed it seems to not be relevant.

I was reading the olve11's thread (Modern (Black) kitchen) and the subject appeared. To test that I tried reproduced his glass mug in a low and high poly version (2.2K and 12K respectively) and I used Instances to add 14 copies of them to each test scene. (olve11, please, do not prosecute me for plagiarism Smile)
By using PhotonMap High + AA0.3 and Resolution of 800x600 these were the results:
Quote:Lo
Octree Analysis (72518 triangles, 81760 nodes, 45705 leaves, 0 unmeshed objects, 0 instances, 12Mb memory)
Total Gatherings : 156350, Total Interpolations : 8380282
Total Ray Tests : 809448241, Intersections found : 693385164
Finished in 9 minutes and 7 seconds!

Hi
Octree Analysis (362950 triangles, 323784 nodes, 188938 leaves, 0 unmeshed objects, 0 instances, 54Mb memory)
Total Gatherings : 144088, Total Interpolations : 6480072
Total Ray Tests : 668808222, Intersections found : 581793073
Finished in 9 minutes and 8 seconds!
It's interesting that except by the Octree Analysis values, all the other numbers decreased for the Hi poly count version. Huh

[Image: glass-mug-lo-hi.jpg]* I tested in a poor i5 650 3.2GHz (4 threads)

So, is there any gain reducing the poly count? Yes, the memory usage. It can be relevant for a complex scene if your memory resource is limited.
For this sample the pick of memory - used by the Kerkythea process - for the Lo and Hi poly version was 206MB and 273MB respectively.

Another thing I noticed was that Kerkythea seems to optimize its process in some situations too.
I did two renders from the same scene, but one was a closeup and other a far shot. I used PhotonMap High + Caustics + AA0.3 and Resolution of 800x600 and the render time was 2:29 and 1:25 respectively:
[Image: close-and-far.jpg]* I tested it in a better PC (i7 K4770 - 8 threads)
The same closeup render made in that i5 650 3.2GHz (4 threads) took 3:10 to get ready.
Hello to all who like Kerkythea rendering.
In Kerky i love MLT rendering system. Because it is very real.
Until recently I was using Photon Mapping, but if I was in any way setting a balanced, i never reach the desired result.
But MLT takes along time, because it is very realistic and use complex calculations.
Therefore simply, you need a powerful CPU.
Important are CPU, which do not have a problem with called "floating point"
On my motherboard can be installed up AMD Phenom II x6. (have good results with floating point calculations)
So i found AMD Phenom II x6 1055T with cooler for 74 Eur and i got one Smile.
There is photos from my upgrade from Athlon II x2 250 to Phenom II x6 1055T Smile


and finally see the results


and Batmobil

AMD Athlon II x2 250 - 2 hours (MLT one car)


AMD Phenom II x6 1055T - 25 minutes (MLT three car)
(with no noise postprocess corrections!)


And of course Photon mapping does not render some materials correctly.
Especially materials using the Index of Refraction values (IOR) and reflections.
Here is tutorial, how i create hedge with Kerkythea Instancing brush. (cutted version)

And here is link to download Hedge Kerkythea file, with every single all .obj, .wings files and textures (leafs difuses, opacity map (clip mapping in Kerkythea)).
Nice tip olve11.

Two tips to cut a couple of mouse actions: in AutoUV before scale the islands change to Vertex mode [V] - the islands will grow keeping the location relative to each other;
Kerkythea, moving around an object is easy if you select it - works like Aim to selection [A] in Wings3D.
(03-28-2017, 09:06 AM)micheus Wrote: [ -> ]Nice tip olve11.

Two tips to cut a couple of mouse actions: in AutoUV before scale the islands change to Vertex mode [V] - the islands will grow keeping the location relative to each other;
Kerkythea, moving around an object is easy if you select it - works like Aim to selection [A] in Wings3D.

Thanks for tips Cool
That is a tip by olve11 for which I created some illustrative pictures. Smile

If we want to stack texture images we to work with a layered material and it's weight. But, if we don't want them mixed we must to use masks to ensure the proper overlapping. In this case we must to set a mask for each material Weighting which each layer mask must be combined with the previous one.


So, in the Material editor dialog we first select Layered material; then in the Weighting box we select one Weight #<n> and in the Texture Editor box we start to set the mask (2nd image with the process flow). Notice that the first block (top most) must be repeated for every Weight#<n> property:


In this sample I used .png images with alpha that are used as the mask - see the Alpha Channel property checked and inverted for every Weight# in image.

Because we want to mask the material we are going to use the "x" icon to 'Add mask layer'. This process will ensure we are able to stack as many material/textures as we want:
Very useful for interior designers.
test render
360 render - how to
Yeah, that's a cool tip.
What was my surprise to discover it was shared by a Brazilian fellow. Smile
Pages: 1 2 3 4