• Website
  • Search
  • Member List
  • Help
  • Old Forum
  • Social Media
    •   @Wings3dOfficial
    •   @Wings3dOfficial
    •   Wings3dOfficial
    •   Wings3dOfficial
  • Register
  • Login
  • Website
  • Search
  • Member List
  • Help
  • Old Forum
  • Register
  • Login
Wings 3D Development Forum Wings 3D Gallery v
« Previous 1 … 3 4 5 6 7 … 17 Next »
Low poly shoe

 
  • 0 Vote(s) - 0 Average
Low poly shoe

Hank
Offline

Senior Member

Posts: 295
Threads: 94
Joined: Dec 2013
#1
02-05-2017, 05:32 PM
Hi guys,

Some fast work to test AO option (thanks to Olve11) - I followed his advice and you can check the result.
Modeled: W3D 2.1.5 + Mlab (shoelace)
Texture: Gimp 2.8.16 ( 2048x2048 )

Tri: 3038

(with AO)


(without AO)


(wire)


(UV Map)


(shoelace from Mlab)


It's hard to admit but I never used AO before Sad I've seen this map many times but never wonder how or why to use it - even for my previous work the diffuse was shaded manually and it's nothing simple to achieve. Anyhow, in 2.1.5 I found also Normal Map option and I wonder what's the difference between external soft (xNormal / Gimp), can anyone share with some experience?

BR, Hank
My gallery: marcone.pl
Marcin Maćkowiak
Offline

The only limit is your imagination

Posts: 171
Threads: 36
Joined: Jan 2013
#2
02-06-2017, 12:08 PM
Well done! Could you explain how did you do the shoelace? I can see that it`s Mlab but still don't know how exactly do that.
Follow me:
YOUTUBE
INSTAGRAM
FACEBOOK
WEBPAGE
Hank
Offline

Senior Member

Posts: 295
Threads: 94
Joined: Dec 2013
#3
02-06-2017, 01:26 PM
Hi Marcin,

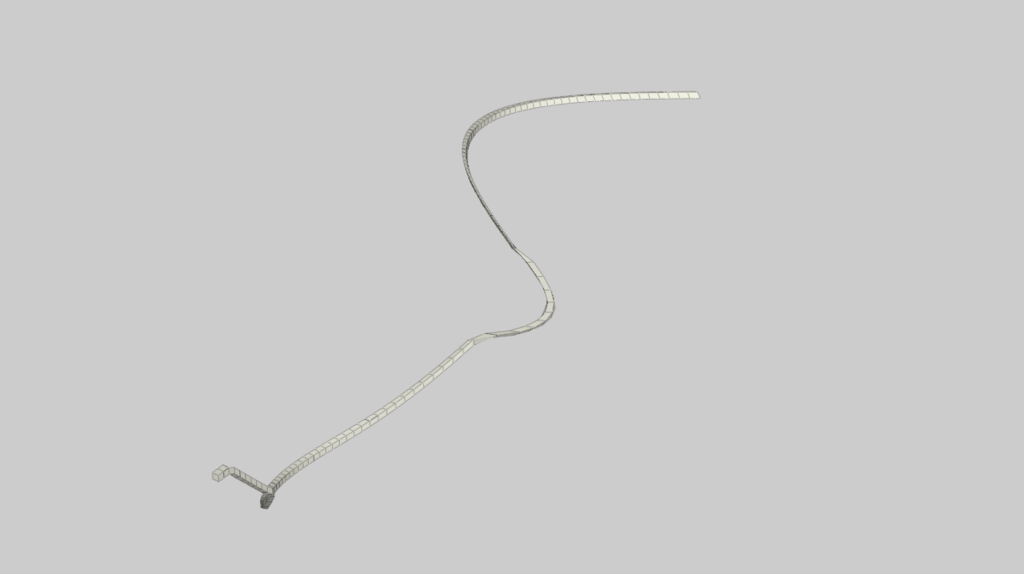
here are my steps:
1. create object which you want to use for path
Usually I cut some cube and scale it along one axis, later move requested vertices, so it meets path directions (easier to manage with several geometry windows)


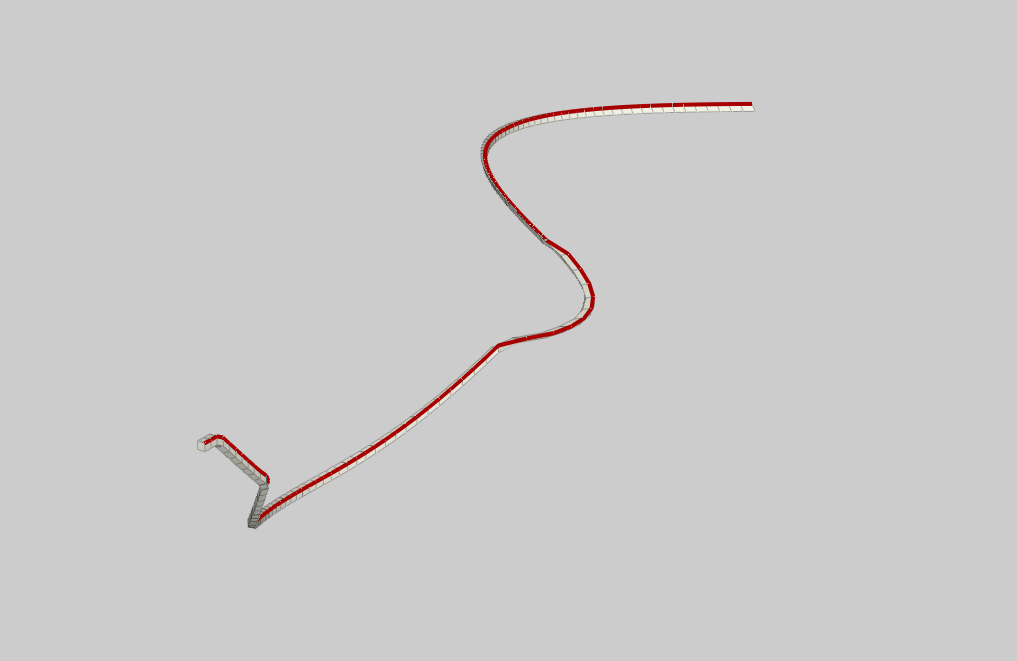
2. select one edge + L


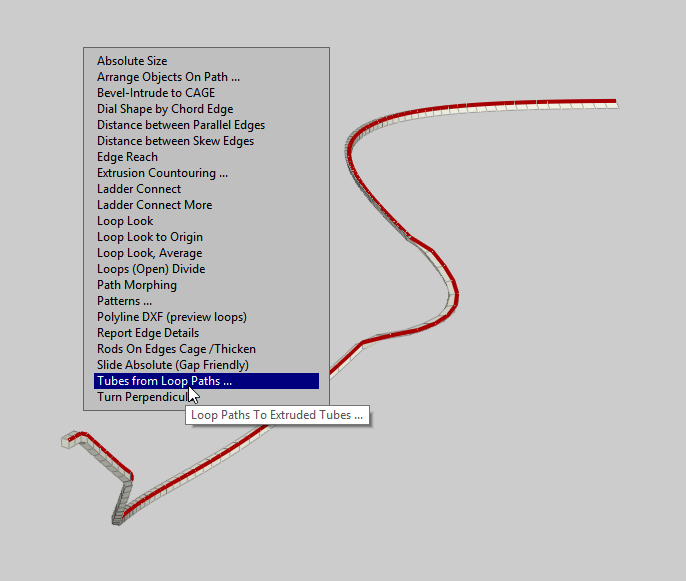
3 RMB + Lots more + Tubes from loop paths


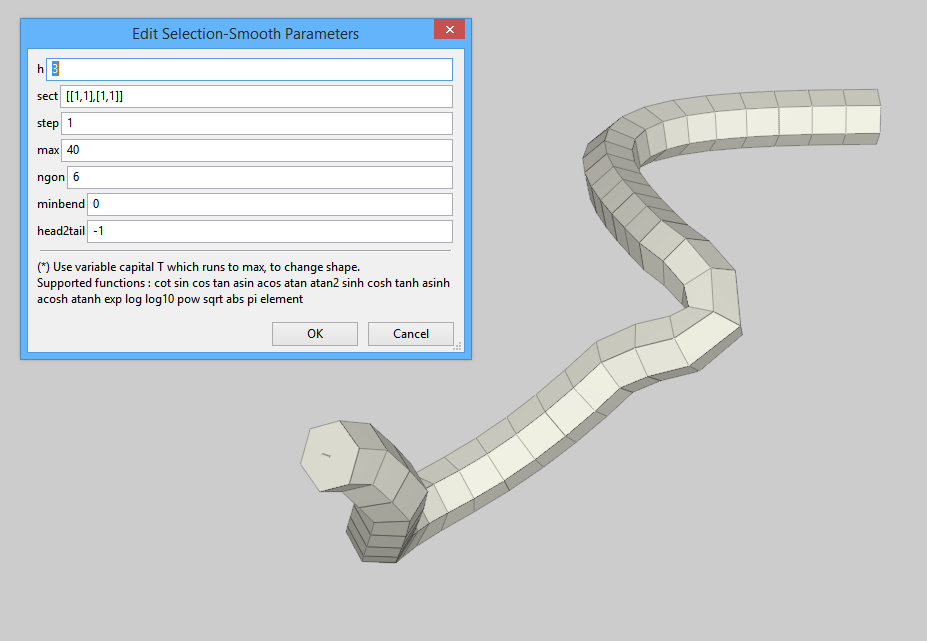
4. modify the values according to your needs (ngons, size, max number of steps etc.)


Let me know if any help needed.

BR, Hank
My gallery: marcone.pl
micheus
Offline

Forum's Admin and Support | Bug fixer
Posts: 3,676
Threads: 183
Joined: Jun 2012
#4
02-06-2017, 04:31 PM
(02-05-2017, 05:32 PM)Hank Wrote: I found also Normal Map option and I wonder what's the difference between external soft (xNormal / Gimp), can anyone share with some experience?
Hank, I added a post dedicated to that in the How To session: Using the Wings3D 'Create Normalmap' feature
[Image: tw.png] @MicheusVieira [Image: yt.png] @MicheusVieira [Image: da.png] Micheuss [Image: ig.png] micheus4wings3d
* Wings3D Team stands for: Björn and Dan
olve11
Offline

Member

Posts: 233
Threads: 51
Joined: Dec 2012
#5
02-06-2017, 07:40 PM
Great work!
InExPro studio

Lord of Galaxies

Lord of Galaxies donation thanks
Hank
Offline

Senior Member

Posts: 295
Threads: 94
Joined: Dec 2013
#6
02-07-2017, 06:16 AM
(02-06-2017, 04:31 PM)micheus Wrote:
(02-05-2017, 05:32 PM)Hank Wrote: I found also Normal Map option and I wonder what's the difference between external soft (xNormal / Gimp), can anyone share with some experience?
Hank, I added a post dedicated to that in the How To session: Using the Wings3D 'Create Normalmap' feature

Thanks Micheus,
But to be honest, since I already use Gimp for most of my works, I will follow oort's advice and try GIMP Normal Plug in (insane bump) - it's combined version of spec/normal/displacement/occlusion.
Anyhow, Normal Map in W3D is great option too.

BR, Hank
My gallery: marcone.pl
kenmo
Offline

Member

Posts: 61
Threads: 9
Joined: Nov 2012
#7
02-07-2017, 12:35 PM
(02-06-2017, 01:26 PM)Hank Wrote: Hi Marcin,

here are my steps:
1. create object which you want to use for path
Usually I cut some cube and scale it along one axis, later move requested vertices, so it meets path directions (easier to manage with several geometry windows)


2. select one edge + L


3 RMB + Lots more + Tubes from loop paths


4. modify the values according to your needs (ngons, size, max number of steps etc.)


Let me know if any help needed.

BR, Hank

Sorry but I really don't see the difference between the object you start with in step 1 and the final object in the last step. What am I missing?
Hank
Offline

Senior Member

Posts: 295
Threads: 94
Joined: Dec 2013
#8
02-11-2017, 06:03 PM
Quote:Sorry but I really don't see the difference between the object you start with in step 1 and the final object in the last step. What am I missing?

Take a look at first object - it's a deformed cube and the final is created with hexagon. And you can create even more complicated if you want...
See below recoding and try to create it with W3D under 3 min. Smile

(click for larger view)
made with Mlab


BR, Hank
My gallery: marcone.pl
« Next Oldest | Next Newest »

Users browsing this thread: 1 Guest(s)


  • View a Printable Version
  • Subscribe to this thread
Forum Jump:

© Designed by D&D - Powered by MyBB

Linear Mode
Threaded Mode